This guide will show you how to add new members to the Skype Manager to use for Skype Gateway.
With Skype Manager, it's easy to monitor and control your members' Skype usage. Simply add them as members of your Skype Manager, and you can allocate them Skype Credit, assign them features, and track their spending, all in one place.
There are two types of Skype accounts - personal and managed. Personal accounts belong to the individual using that account, whereas managed accounts are created in Skype Manager™ and belong to the Skype Manager that created them.
To retain full control of your members' Skype usage, you should only add members with managed Skype accounts. You can also create managed accounts for those people you want to join your Skype Manager who do not currently use Skype.
You can add one member at a time, or you can use a CSV file to add many people (for example, all of your members at the same time):
- Sign in to Skype Manager.
- Click Members in the toolbar to display the All members page.
- In the Members menu on the left, click Add members.
- Click Create managed accounts to display the Create managed accounts page.
You can either:
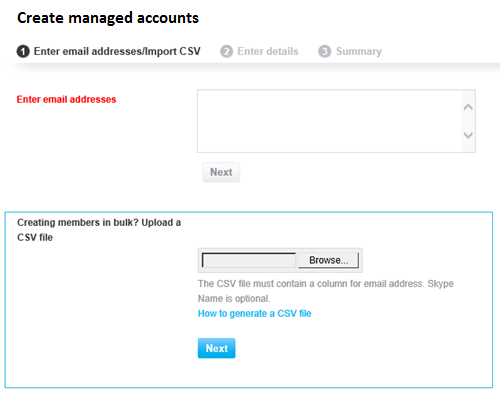
5. Click Next to display the following page.
- Enter the email addresses of each member in the Enter email addresses field.
- Click Browse to import members by using a CSV file generated from your existing directory. The required columns for the CSV file are:
- E-mail (required) (e.g., [email protected])
- Username (optional) (e.g., first_last)
5. Click Next to display the following page.
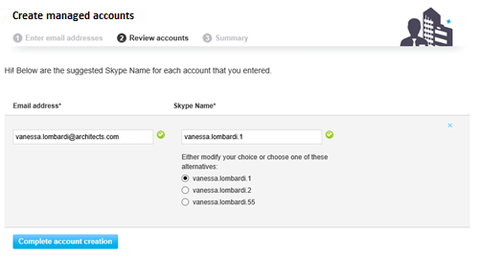
6. Check the details for each member. Click on a suggested Skype Name to edit the details of the new managed account.
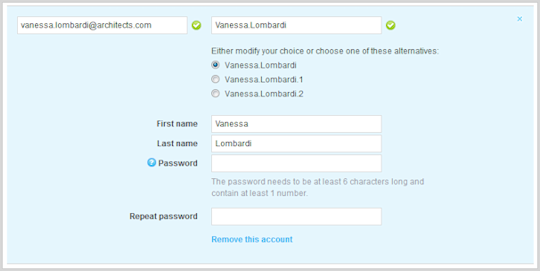
You can also add either the member's first name, last name, or set a password for them.
Remember: The member will be sent an email requesting them to set their own password. The member will need to set their password before they can start using Skype.
7. Click Create accounts. The new managed accounts are created and the members are added to your Skype Manager. Emails are sent to the new members to inform them that their accounts have been created.
Be aware that new managed accounts have no Skype Credit, subscriptions or Skype Numbers assigned to them.
 RSS Feed