This guide will show you how set up on-premise account with your Room Video Conferencing System (RVC).
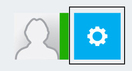
To get started,
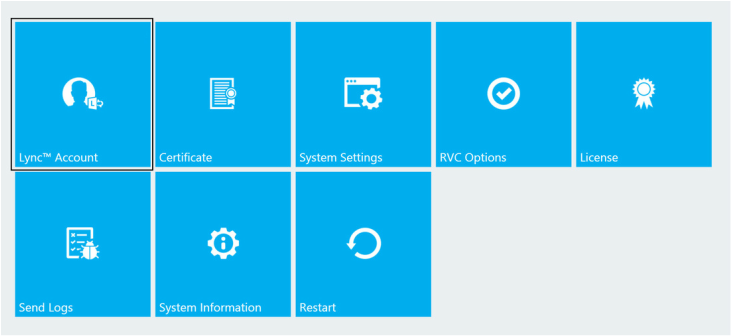
- Open RVC Settings
- Select Lync™ Account
We will describe four scenarios as the following:
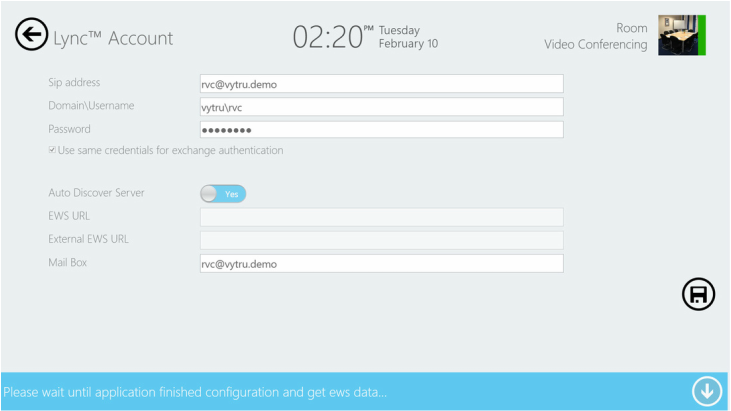
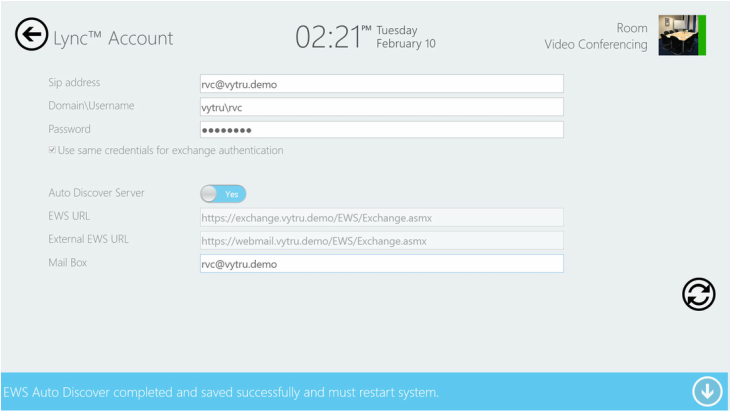
In Scenario A:
In Scenario A:
- In the Sip address text box, type your account e.g. rvc@vytru.demo
- In the Domain\Username text box, type your account e.g. vytru\rvc
- Select Use same credentials for exchange authentication checkbox.
- Set Auto Discover Server to Yes
- In the Mail Box, type your account e.g. rvc@vytru.demo.
- Click Save button.
- You have to restart you system by clicking Restart button (2 arrows).
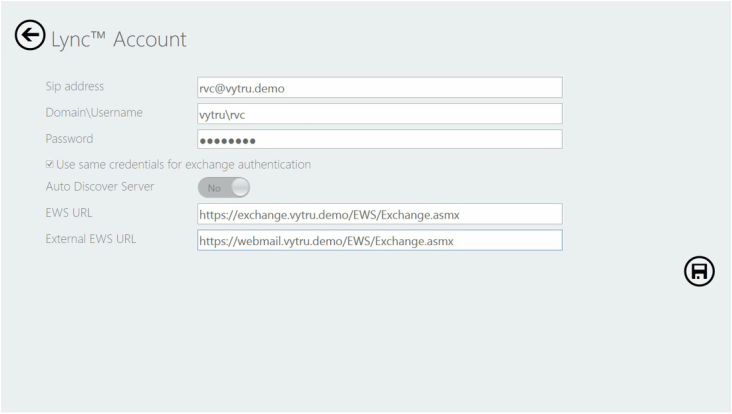
In Scenario B:
- In the Sip address text box, type your account e.g. rvc@vytru.demo
- In the Domain\Username text box, type your account e.g. vytru\rvc
- Select Use same credentials for exchange authentication checkbox.
- Set Auto Discover Server to No
- In the EWS URL , type your internal EWS URL e.g. https://exchange.vytru.demo/EWS/Exchange.asmx
- In the External EWS URL, type your external EWS URL e.g. https://webmail.vytru.demo/EWS/Exchange.asmx
- Click Save button.
- You have to restart you system by clicking Restart button (2 arrows).
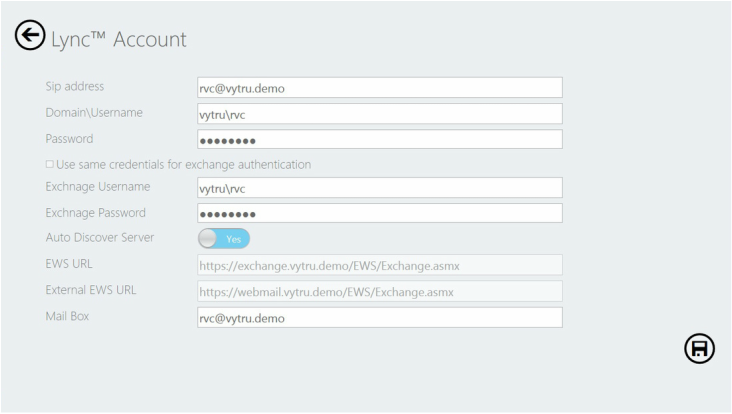
In Scenario C:
- In the Sip address text box, type your account e.g. rvc@vytru.demo
- In the Domain\Username text box, type your account e.g. vytru\rvc
- Deselect Use same credentials for exchange authentication checkbox.
- In the Exchange Username text box, type your account e.g. vytru\rvc
- Set Auto Discover Server to Yes
- In the Mail Box, type your account e.g. rvc@vytru.demo.
- Click Save button.
- You have to restart you system by clicking Restart button (2 arrows).
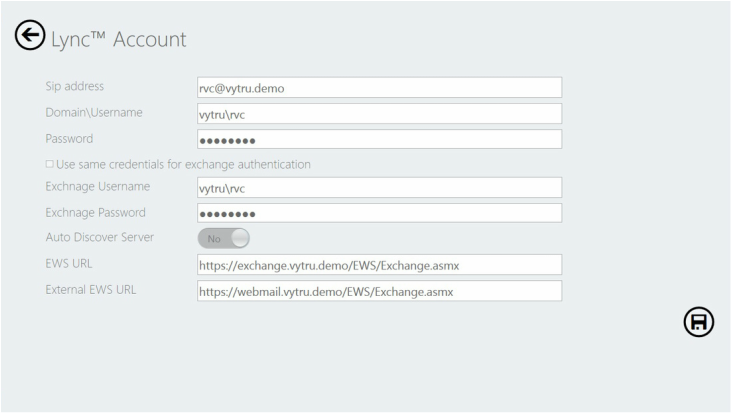
In Scenario D:
- In the Sip address text box, type your account e.g. rvc@vytru.demo
- In the Domain\Username text box, type your account e.g. vytru\rvc
- Deselect Use same credentials for exchange authentication checkbox.
- In the Exchange Username text box, type your account e.g. vytru\rvc
- Set Auto Discover Server to No.
- In the EWS URL , type your internal EWS URL e.g. https://exchange.vytru.demo/EWS/Exchange.asmx
- In the External EWS URL, type your external EWS URL e.g. https://webmail.vytru.demo/EWS/Exchange.asmx
- Click Save button.
- You have to restart you system by clicking Restart button (2 arrows).
Related Posts
 RSS Feed