1. Introduction
Contacts Manager for Lync is a new tool specially designed to ease and simplify the task of contacts management centrally and automatically, specifically: creating and maintaining contact lists, adding/removing contacts, and updating contacts and contact lists for your entire network. With Contacts Manager for Lync, your organization will save time and money as well as boost efficiency.
1.1 Overview
Contacts Manager for Lync is a reliable 3rd party solution designed to ease the process of contact management for Lync. It is aimed at provisioning the process of creating, maintaining, adding/removing, populating, and updating pre-set contact lists for all the users at once. Managing contacts couldn’t be easier, that means saving considerable amounts of time and efforts, while increasing the productivity for your IT administrators at a notable rate.
1.2 Solution
Contacts Manager is a cost effective solution that helps IT and System Admins manage the company contact lists throughout the organization and, its branches all over the world. Now, there is no need to use power scripts or other means that require an increase in IT involvement.
1.3 Features
- Manage contacts and groups for all users from any endpoint in the company at the same time.
- Edit and manage contact Lists for some or all users.
- Create multi-contact lists for the company.
- Create up to 64 distribution groups in any contact List.
- Populate custom contact List.
- Populate contact List for a specific user.
- Copy any group from contact list to any other contact list.
- Create, save and restore a backup for contact Lists.
- Push a contact list to all/some users.
- Build multiple contact lists and populate/push to a different groups of users.
- Add and remove images for any user.
- Enable/disable any to any pool when running multi-pools.
- Multiple select and add users from active directory to a contact list.
- Wipe a contact for any user.
- View a user’s current contact list.
- Wipe a contact from all assigned users.
- Search a contact list for a specific group.
- Search a group for a specific contact.
- Populate a contact list for specific user.
- Any contact list can contain two types of groups (normal groups created by Contacts Manager and distribution groups from the active directory).
- Any user of Contacts Manager can specify whether to display images in Contacts Manager Environment or not.
- Any user of Contacts Manager can create/populate federated SIP contact.
- Any user of contacts Manager can filter users retrieved from active directory by SIP Address, or Department or UPN or Name or Telephone Number or Manager.
- Any user of contacts Manager can export/import specific contact list.
- Any user of Contacts Manager can enable users to Lync server.
New features of this release:
- Contacts Manager supports UCS Lync users.
- Contacts Manager supports office 365 Lync users.
- Contacts Manager supports create/populate response groups for all/some users.
- Any user of Contacts Manager can create/populate telephone contact (Not supported in UCS and office 365).
- Any user of Contacts Manager can export contact list for specific user then import it, then populate it to all/some users.
- Any user of Contacts Manager can rename a populated group no a new name (i.e. Rename the HR group to Human Resources group).
2. Using Contacts Manager
2.1 Starting the Application
To start up the application go to the Start Menu and click on “Apps” then open the Contacts Manager or you can simply open it from the desktop icon.

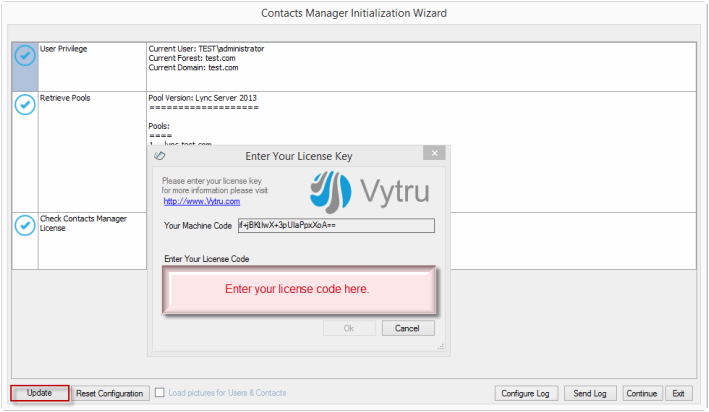
Figure 2.1
Contacts Manager Initialization Wizard Window appears as shown in (figure 2.1), Click on the “Update” button and enter your license code in the License Key Dialog box, then click “OK.” Contacts Manager will proceed to the Initialization Wizard window as follows:
To reset your configuration clearing saved configuration data that contain contact lists, click on “reset configuration” button, (figure 2.2).
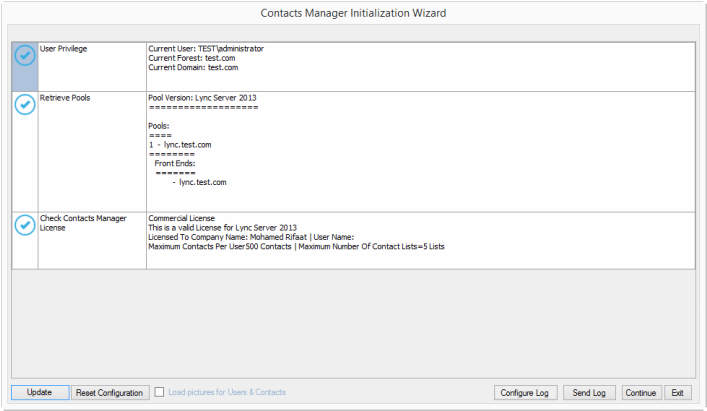
Figure 2.2
Note: In the occurrence of a technical issue, we have added an option through which you can send the log file of your current working state to the Contacts Manager Support Team so; we can easily recognize your issue. Click on “Send Log” (Figure 2.2) then, attach and send it to the [email protected].
You are able to determine to load or unload images of users, and groups from the active directory. Simply check or uncheck the checkbox “Load Pictures for users & Contacts” from the active directory” (figure 2.3).
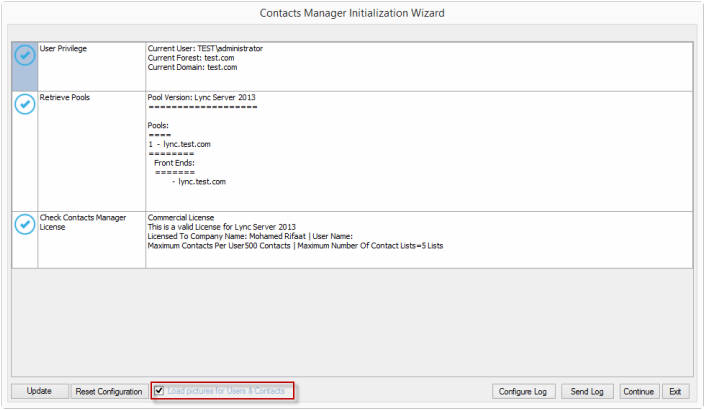
Figure 2.3
To show to the Contacts Manager main window you need to click Continue (figure 2.4)

Figure 2.4
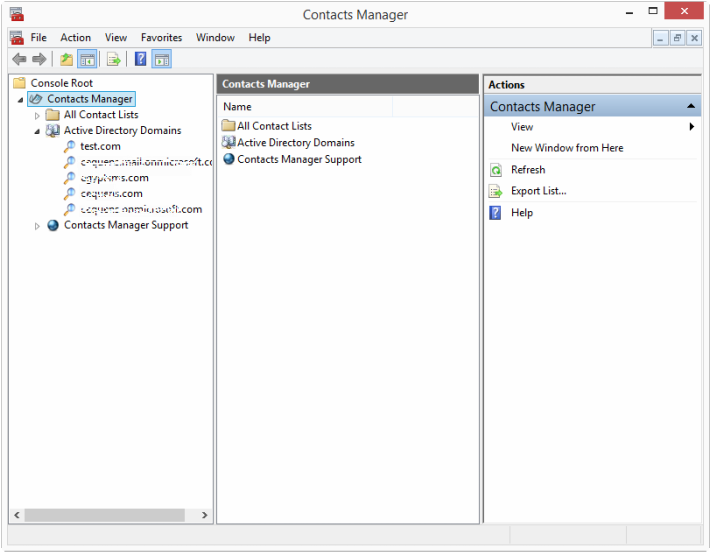
Contacts Manager Main window figure 2.5
3 Using Active Directory
3.1 Displaying Contacts from the Active Directory
To be able to fill the lists and the groups with the contacts, you will have to load all contacts from the active directory, click on the active directory domains in the left menu, all domains at your company will be loaded then choose the domain that you want to add the contacts from (Figure 3.1.1).
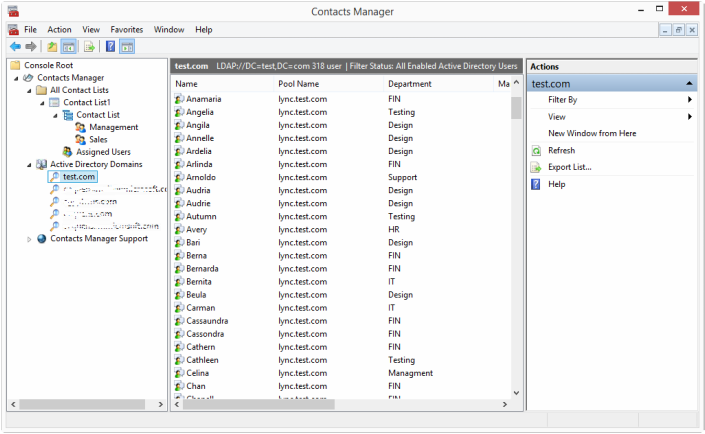
Figure 3.1.1
3.2 Filtering Active Directory
To filter active directory query results by; all, name, department, manager, SIP and UPN; right-click on any domain, choose “Filter By” and choose any filter type (Figure 3.2.1).
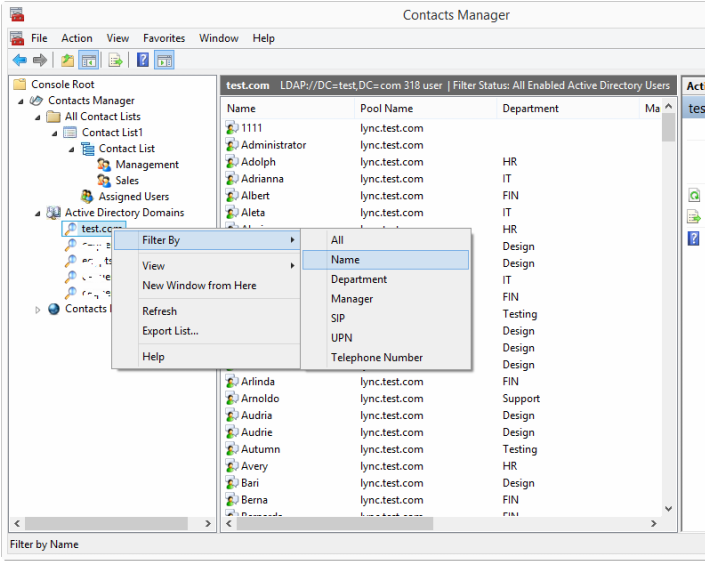
Figure 3.2.1
3.3 Adding Images
To add an image for a user, right-click on a contact then select “Image” then “Add Image”, browse to add an image of your choice (Figure 3.3.1).
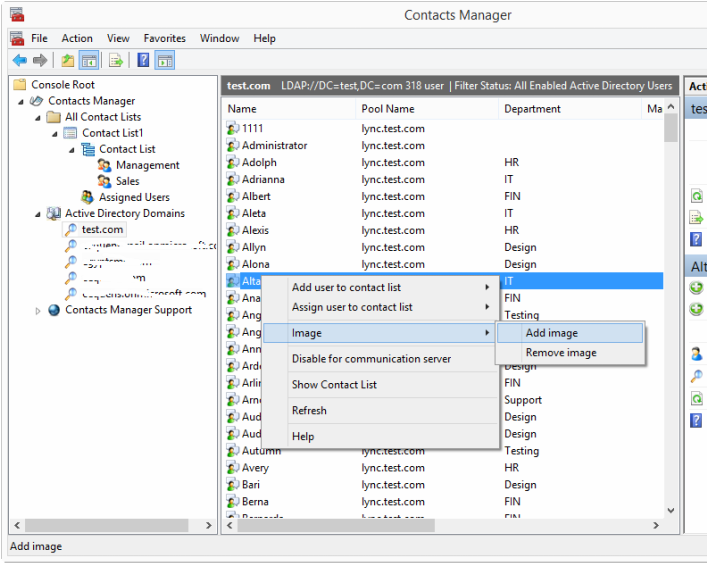
Figure 3.3.1
3.4 Removing Images
To remove an image for a user, right-click on a contact then select “Image” then “Remove Image” (Figure 3.4.1).
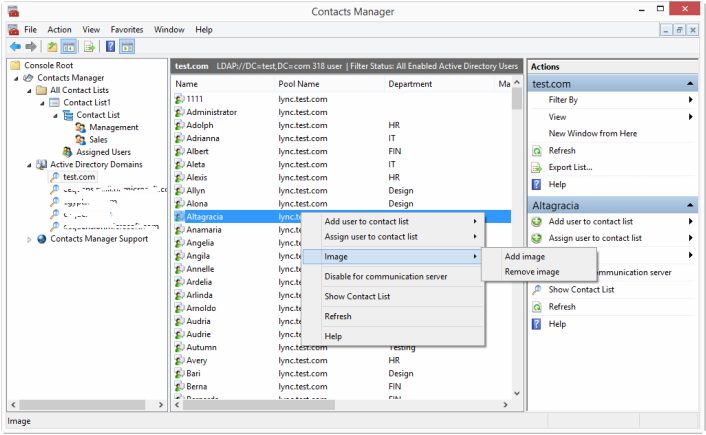
Figure 3.4.1
4 Building Content List
4.1 Creating a New Contact List
To create a new contact list, right-click on “All Contact Lists” then select “Create” (figure 4.1.1).
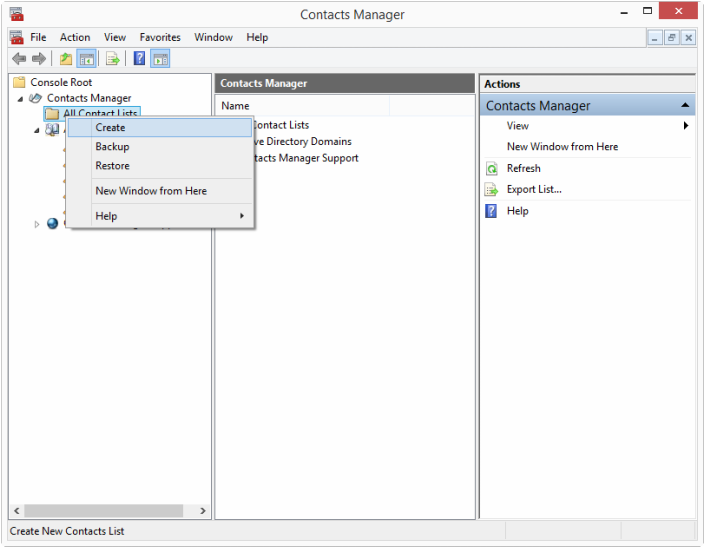
Figure 4.1.1
Give a name to the contact list (Figure 4.1.2)
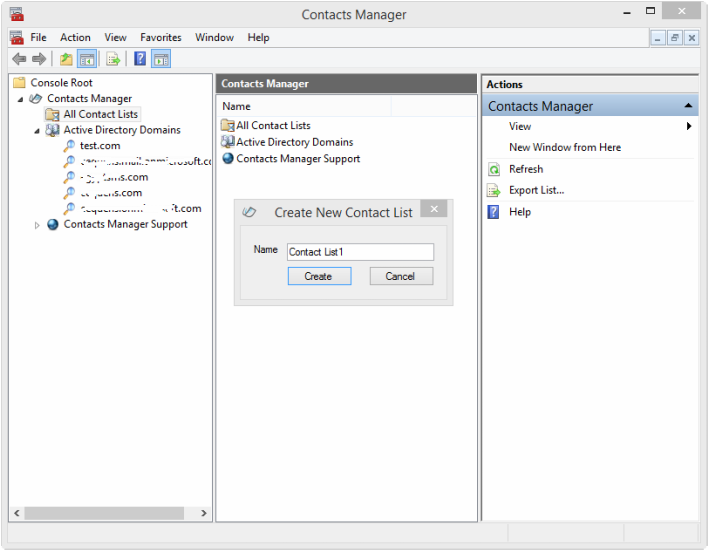
Figure 4.1.2
Your have created new contact list successfully and it contains two sub categories: contact list and assigned user(s) (Figure 4.1.3).
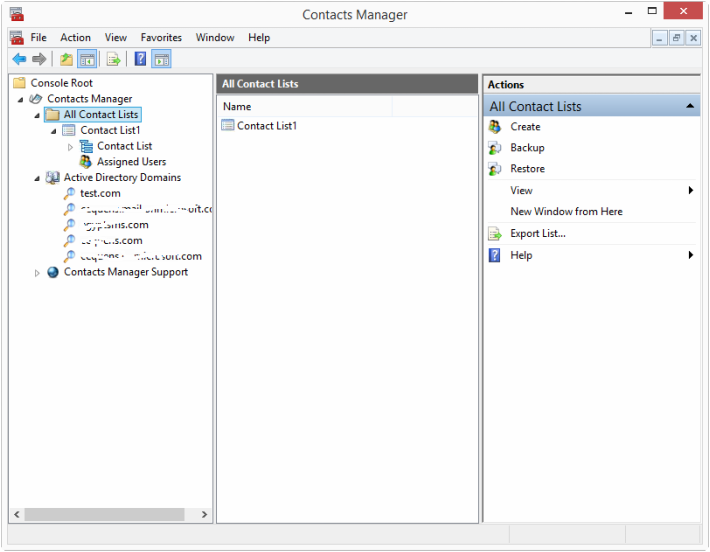
Figure 4.1.3
4.2 Creating a New Group
To create a new group in the contact list, right-click on “Contact List” then select “Create New Group” (Figure 4.2.1).

Figure (4.2.1)
In “Create New Group” dialog box (Figure 4.2.2) enter a name for the new group, and then click “OK”
You can create Up to 100 groups so you are able to create as much group as you want.

Figure (4.2.2)
Now you have your created groups under the contact list (Figure 4.2.3)

Figure (4.2.3)
4.3 Rename Contact List
To rename contact list, right-click on contact list then choose “Rename Contact List” (figure 4.3.1).
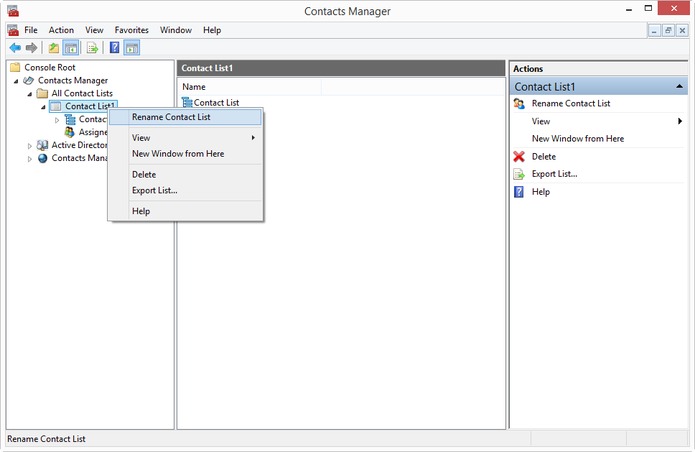
Figure 4.3.1
In “Rename Contact List” dialog box, enter the new name for the contact list (Figure 4.3.2)
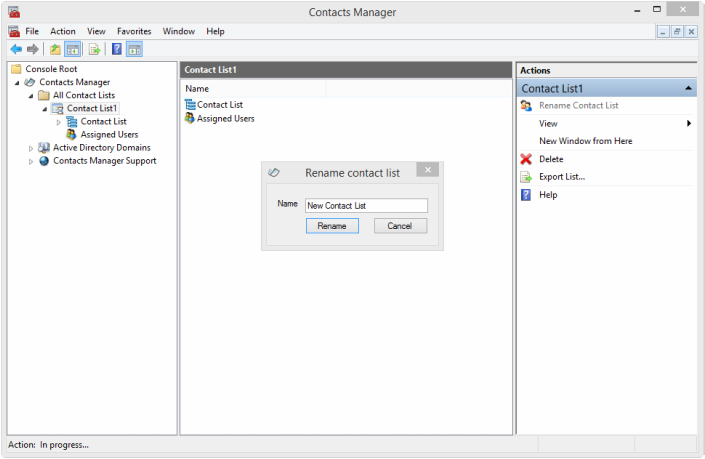
Figure (4.3.2)
A dialog box appears to tell you, it’s recommended to refresh contact manager if you want to refresh now, press “Yes” (Figure 4.3.3)
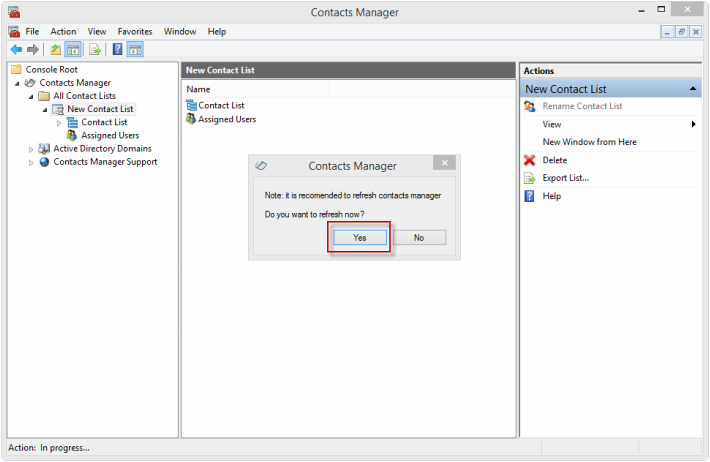
Figure (4.3.3)
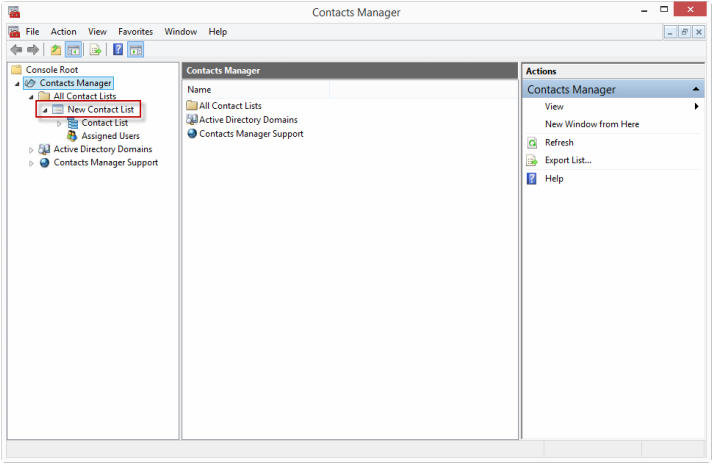
Figure (4.3.4)
4.4 Rename a Group
To rename a group, right-click on the target group then choose “Rename Group” (Figure 4.4.1).
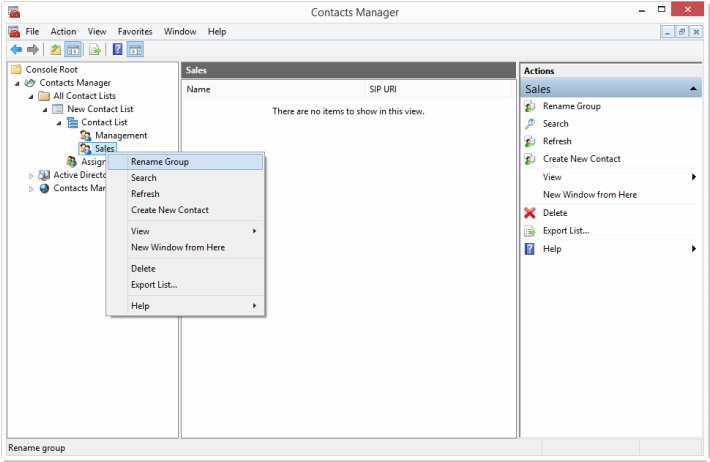
Figure (4.4.1)
In “Rename Group” dialog box, enter the new name for the group then press “Rename” (Figure 4.4.2)

Figure (4.4.2)
Now you have renamed the group successfully and a confirmation message appears (Figure 4.4.3)
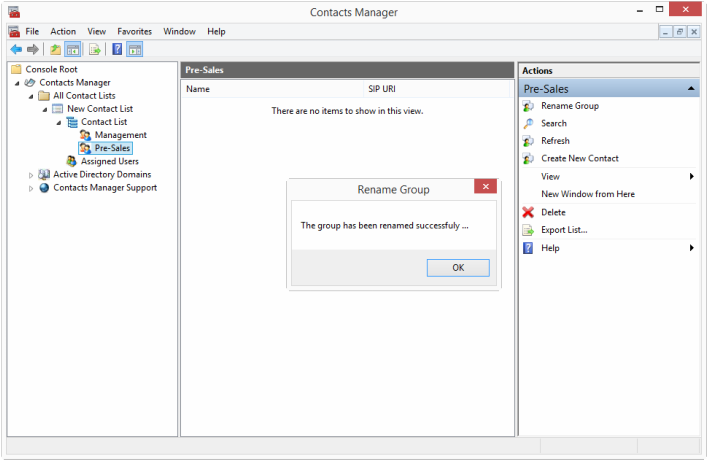
Figure (4.4.3)
4.5 Create New Contact
To create a contact, right-click on the group then choose “Create New Contact” (Figure 4.5.1).

Figure (4.5.1)
In the Create New Contact dialog box, enter the contact’s name and SIP URL, then press “Create” (Figure 4.5.2)

Figure (4.5.2)
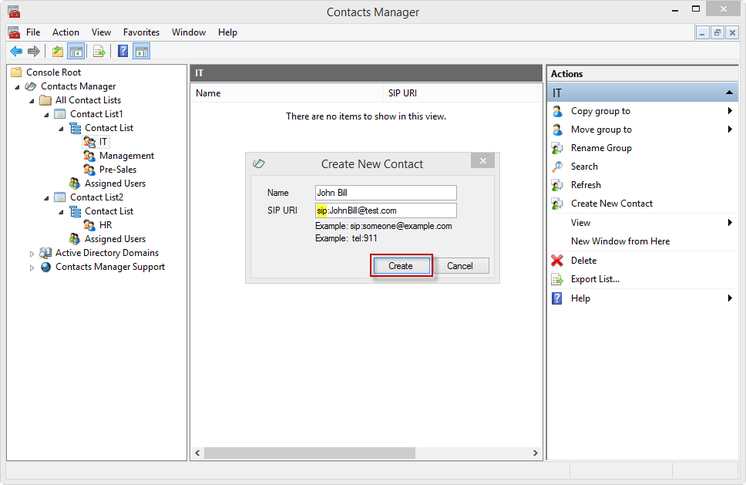
Figure (4.5.3)
Now you have created a contact and you can find it in the group list (Figure 7.4)
4.6 Copy Group
To copy a group, right-click on the group then choose “Copy group to”, and then choose the targeted group name (Figure 4.6.1)
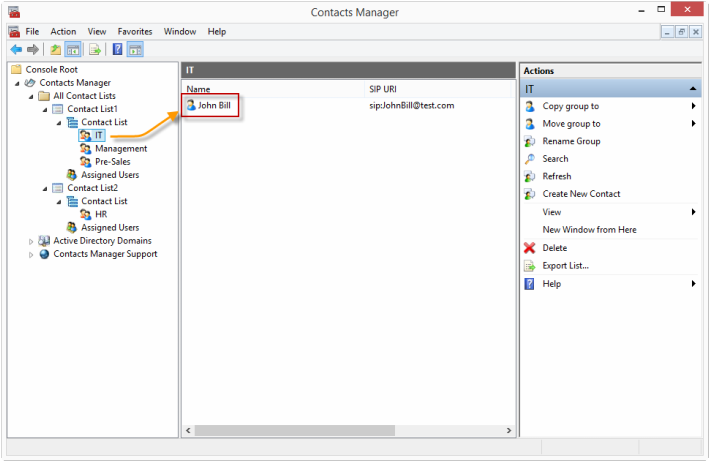
Figure (4.6.1)
Note: Copying group will keep the original group, just copying it to the targeted contact list and a confirmation message appears. (Figure 4.6.2).
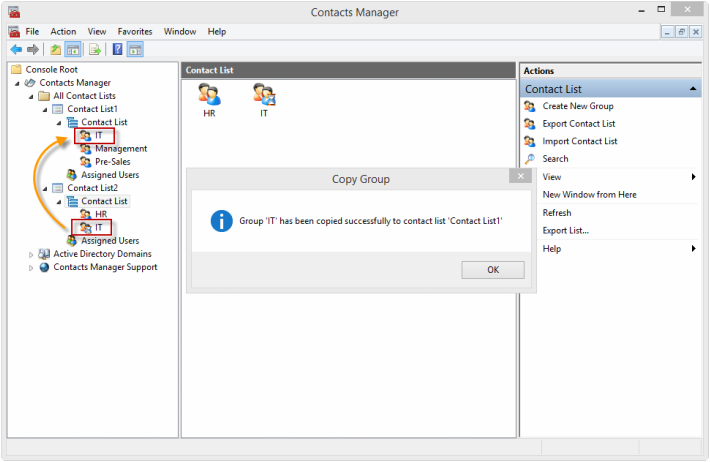
Figure (4.6.2)
4.7 Move Group
To move a group, right-click on the group then choose “Move group to”, and then choose the targeted group name (Figure 4.7.1).
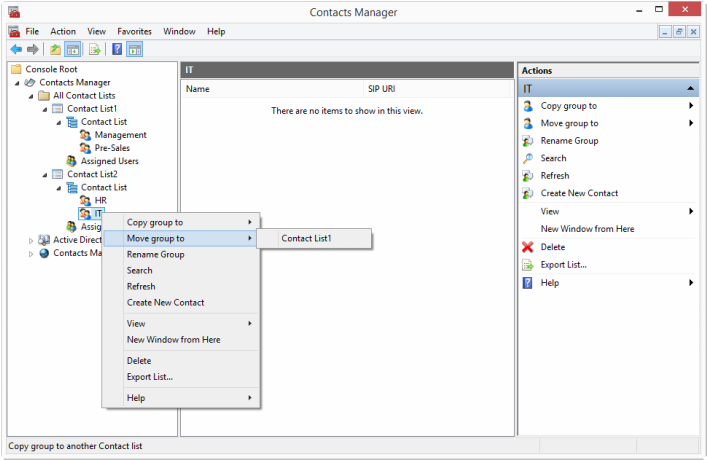
Figure (4.7.1)
A dialog box appears to ask you “Are you sure you want to move (group name)?” press “Yes” (Figure 4.7.2)
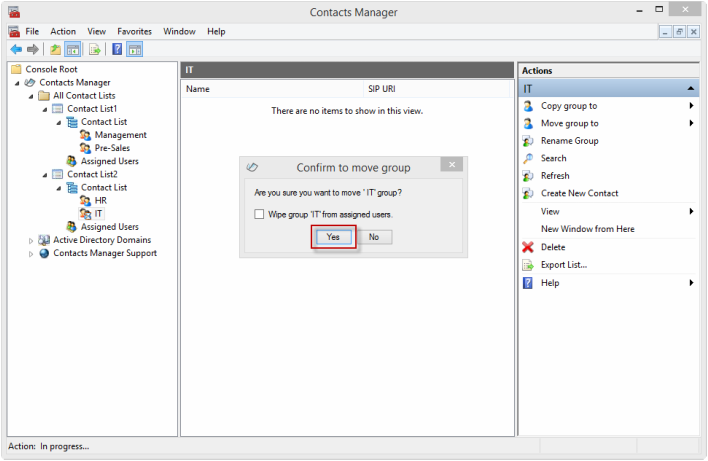
Figure (4.7.2)
Now you have moved a group and you can find it in the new contact list (Figure 4.7.3)
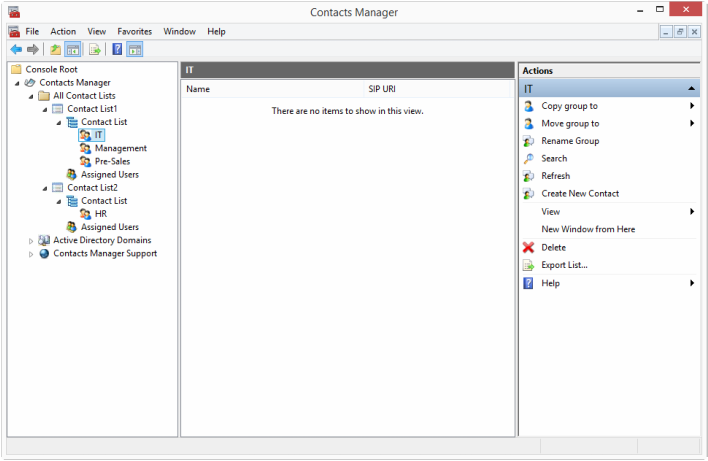
Figure (4.7.3)
4.8 Adding Contacts to a Group
To add contacts in (specific group), right-click on any contact(s) then, select “Add User to Contact List” and select the contact list and choose the group you would like to add the contacts to (Figure 4.8.1).
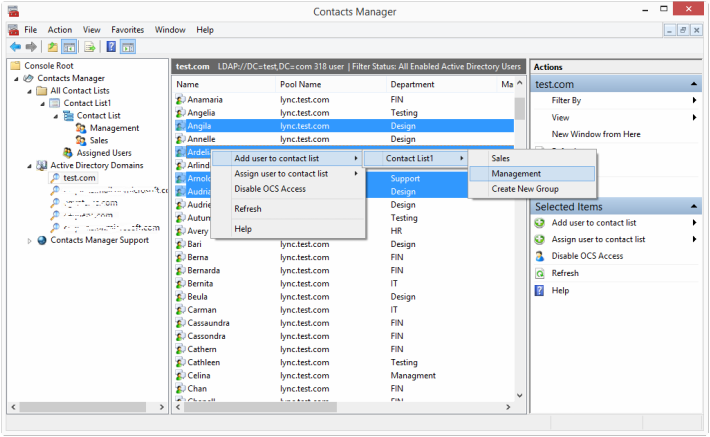
Figure (4.8.1)
Now you have added a contact or multiple contacts to a specific group and a confirmation message with the contacts addresses appears (Figure 4.8.2)
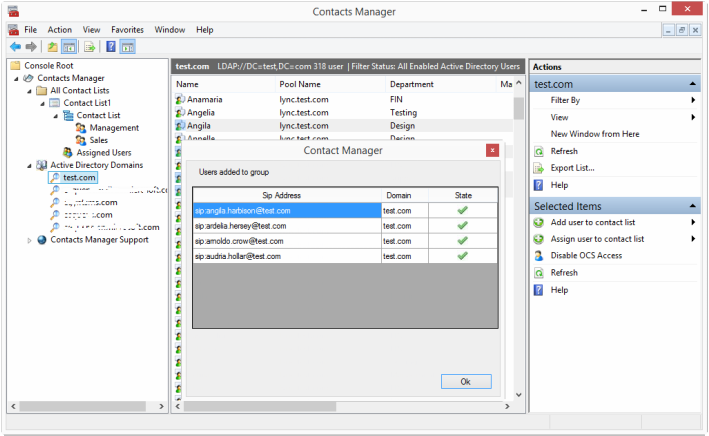
Figure (4.8.2)
4.9 Adding Contacts to a New Group

Figure (4.9.1)
Right-click on any contact or select multiple contacts, then select “Add User to Contact List” after that, select contact list and choose the “Create New Group” option (Figure 4.9.1).
4.10 Adding Distribution Group
To add distribution group as a group in the contact list, right-click on “distribution group” and choose “Add distribution group to contact list”, then choose contact list name (Figure 4.10.1)
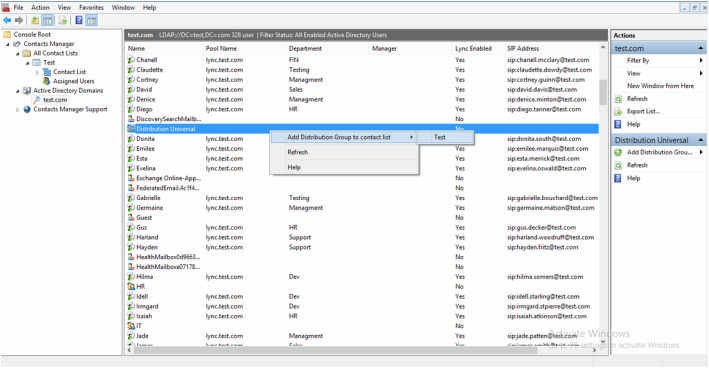
Figure (4.10.1)
5 Assigning Contact List
5.1 Adding Users in “Assigned Users”
To add users in “Assigned Users”, right-click on contact(s), choose “Assign User to Contact List” and choose the contact list that you would like to add users (Figure 5.1.1).
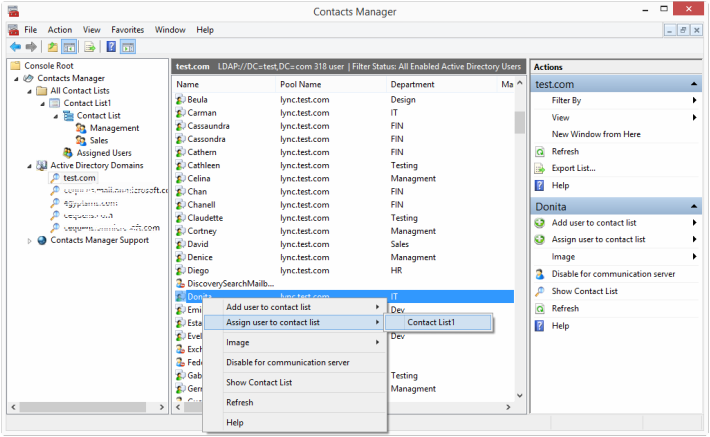
Figure (5.1.1)
Now you can see the assigned contact in the assigned users list (Figure 5.1.2).

Figure (5.1.2)
Note: You can assign one user to one or more contact list.
6 Populating Contact List
6.1 Populating a contact list to single user:
To apply the contact list to a user, right-click on a contact and choose “Populate Contact List” (Figure 6.1.1)
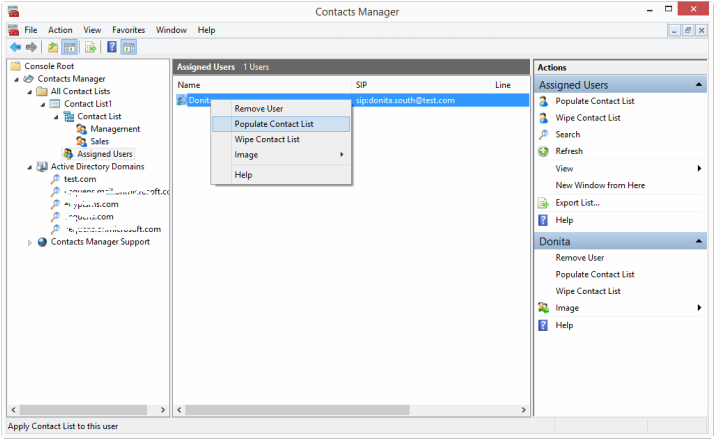
Figure (6.1.1)
A dialog box appears to confirm assigning the contact list to selected user, press “Yes” (Figure 6.1.2)
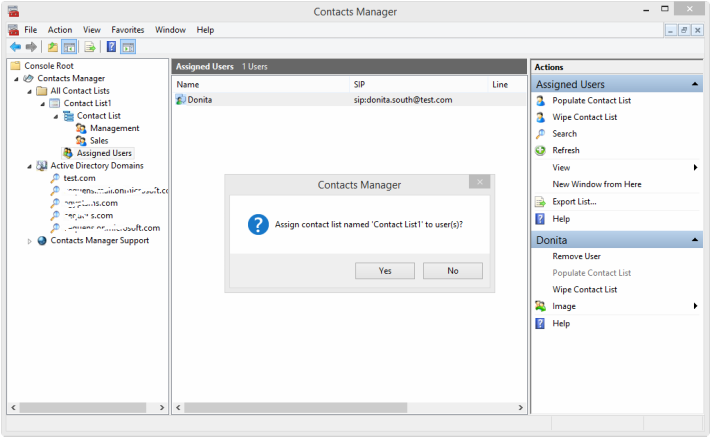
Figure (6.1.2)
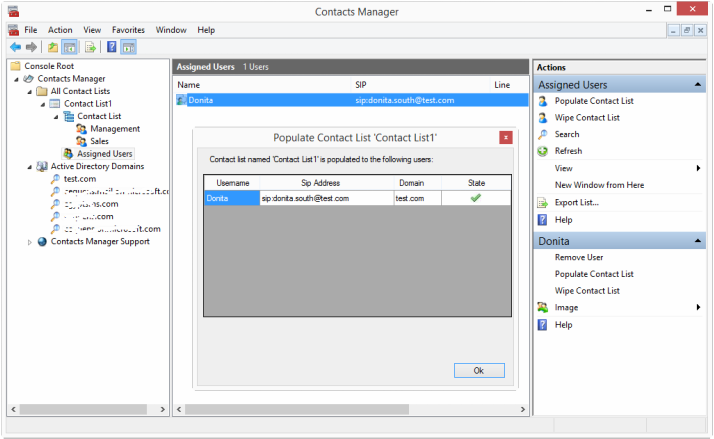
Figure (6.1.3)
Now you have populated a contact list to selected user successfully and a confirmation message with the contacts addresses appears (Figure 6.1.3)
6.2 Populating a contact list to all assigned users
To apply a contact list of all assigned users at the same time, right-click on “Assign Contact List” and choose “Populate Contact List” (Figure 6.2.1).
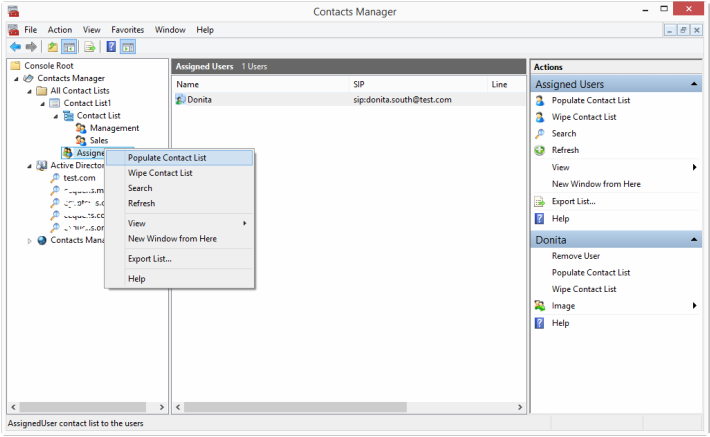
Figure (6.2.1)
A dialog box appears to confirm populating the contact list to all its assigned users , press “Yes” (Figure 15.2).
7. Updating Contact List
7.1 Wiping User’s Contact list
To wipe a user’s contact list from assigned users, click on assigned user right-click on a contact and choose “Wipe Contact List” now the user’s contact list will be wiped and the user will not be removed (Figure 7.1.1).

Figure (7.1.1)
A dialog box appears to confirm wiping all contacts from the selected user, press “Yes” (Figure 7.1.2).
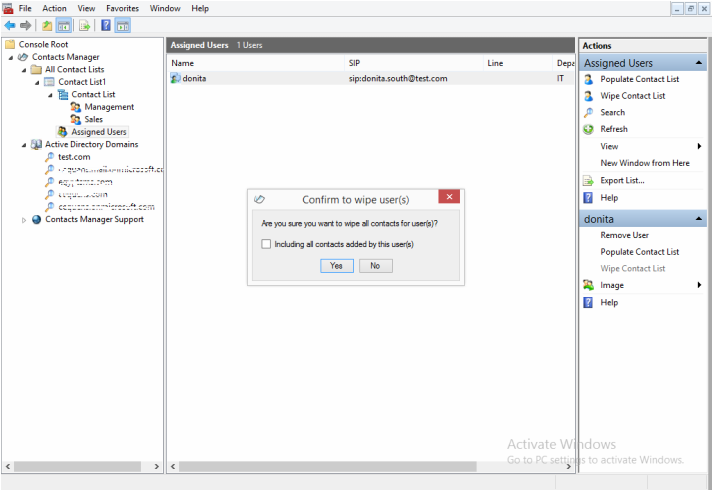
Figure (7.1.2)
Contacts Manager will remove groups and contacts that are existing in the current contact list. By Checking “Including all contacts added by the user(s)” all groups, contacts and manually added groups and contacts will be removed from assigned user.
7.2 Remove user from assigned users
Right-click on the user then, select “Remove User” (Figure 7.2.1).
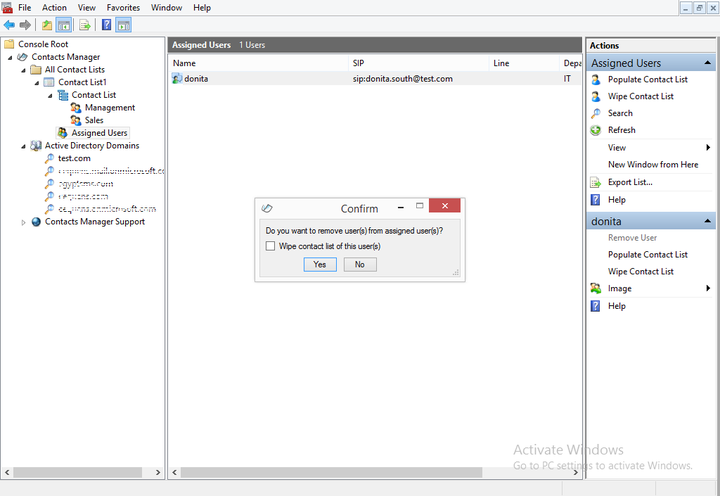
Figure (7.2.1)
Note: Contacts Manager will remove assigned user from contacts manager only.
By checking “Wipe contact list of the user(s)” assigned user will be removed and wipe all his groups and contacts
7.3 Wipe all users
To wipe all users, right-click on “Assigned Users” then, choose “Wipe Contact List” (Figure 7.3.1).
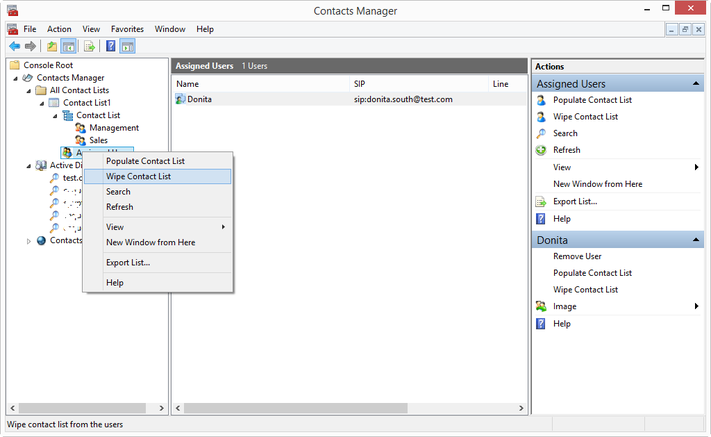
Figure (7.3.1)
7.4 Add new user to an existing contact list
When new employee join your company you can easily get him/her involved very fast to your communication community. To add new user load “active directory” >> choose the new user name by filtering active directory as we mentioned before. Right-click and choose “Add User to Contact List”. Choose Contact List name then choose the Group Name. (figure 7.4.1)

Figure(7.4.1)
8 Contact List Features
8.1 Export Contact List
To export contact list, right-click on contact list then choose “Export Contact List” (Figure 8.1.1).
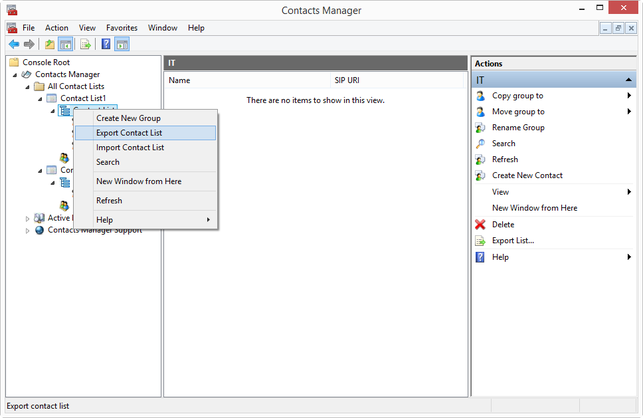
Figure(8.1.1)
Browse to select a contact list file then click “Open” (Figure 8.1.2)
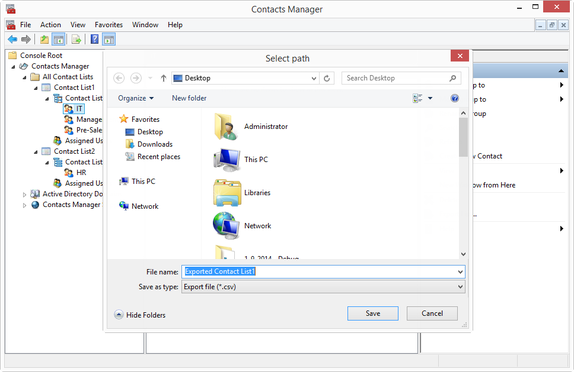
Figure(8.1.2)
A confirmation message appears to confirm that “Export has been successfully” (Figure 8.1.3).
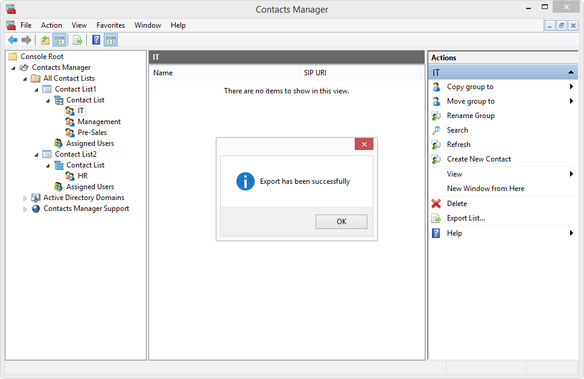
Figure(8.1.3)
8.2 Import Contact List
To import contact list, right-click on contact list then choose “Import Contact List” (Figure 8.2.1).
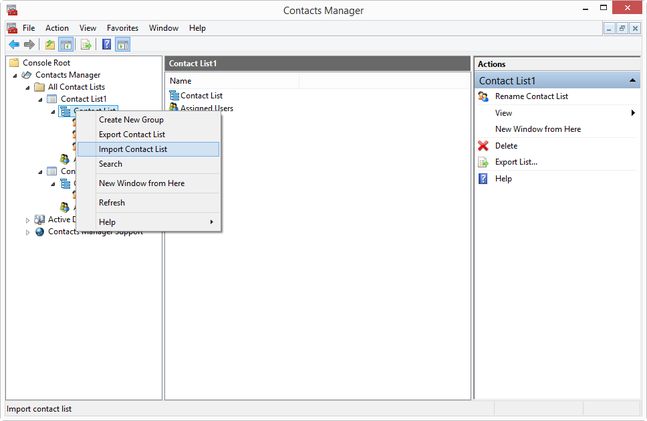
Figure(8.2.1)
Browse to select a contact list file then click “Open” (Figure 8.2.2)

Figure(8.2.2)
A confirmation message appears to confirm that “File has been imported successfully” (Figure 8.2.3).
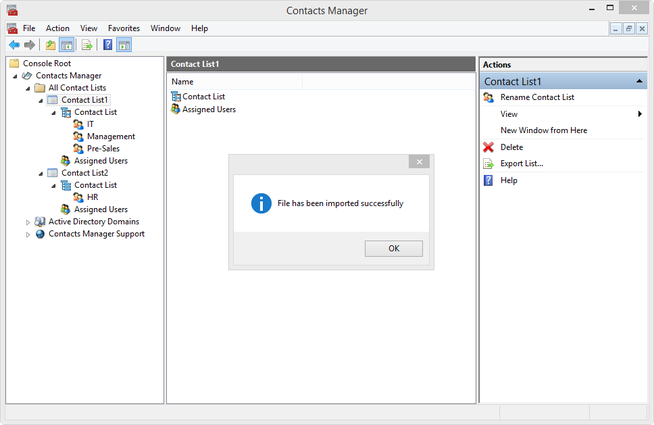
Figure(8.2.3)
8.3 Taking Backup
To make a back-up from the contact list and the group you have created, right-click on “All Contact List” then, choose “Back-up” and save it to your machine (Figure 8.3.1 & 8.3.2) .

Figure(8.3.1)

Figure(8.3.2)
A confirmation message appears to confirm that your backup have been taken successfully (Figure 8.3.3)
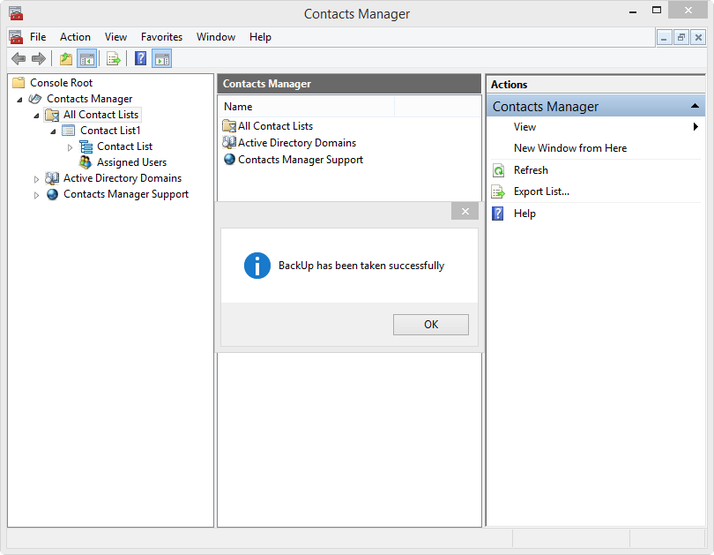
Figure(8.3.3)
8.4 Restore the backup
To restore backup, right-click on all contact lists, then choose “Restore” (Figure 8.4.1).
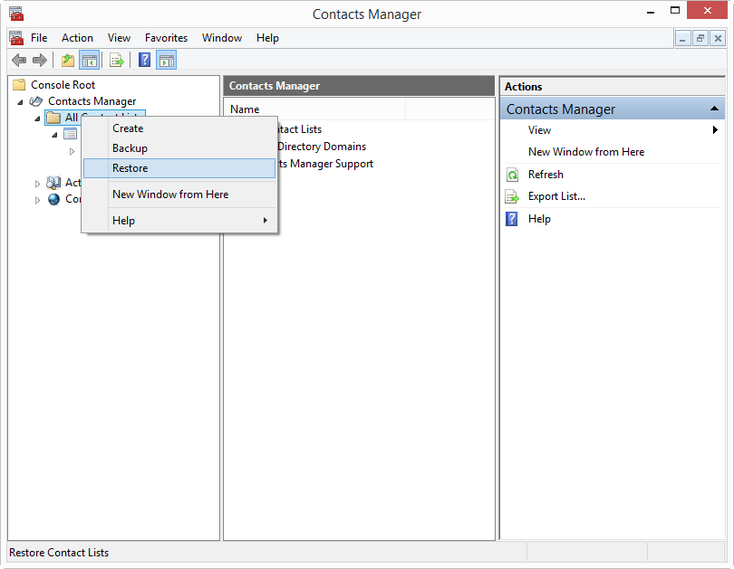
Figure(8.4.1)
Choose the save backup file from your machine (Figure 8.4.2).
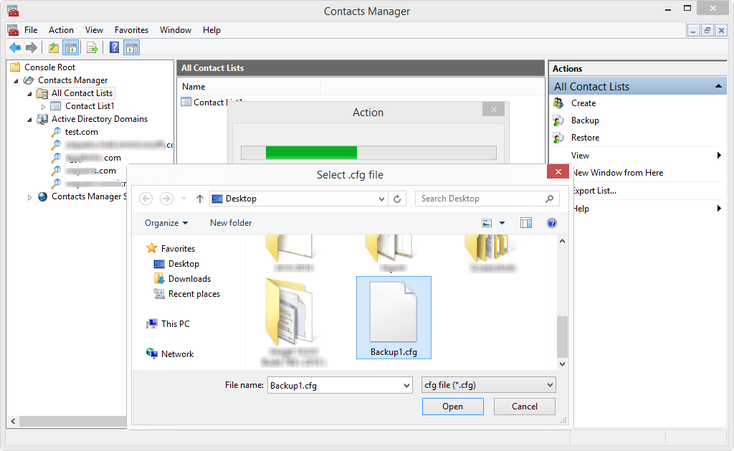
Figure(8.4.2)