Getting Started Guide
What’s in the Box?

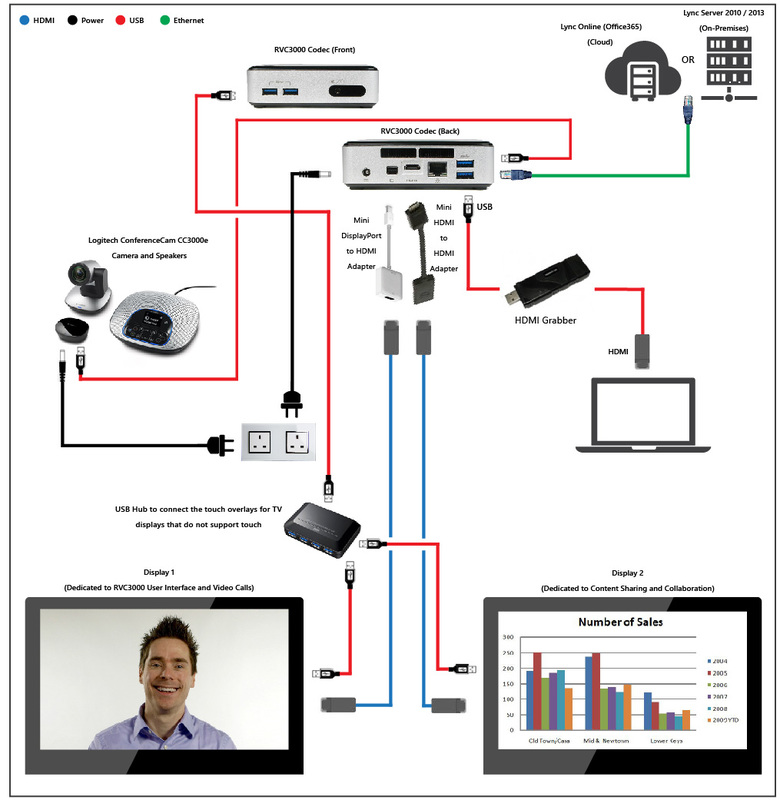
The RVC Codec
|

Logitech ConferenceCam CC3000e Camera
|

Speakers
|
The Accessory Kit contains these components:
- HDMI Grabber – USB Cable (from Grabber to NUC) – HDMI Cable.
- Mini DisplayPort to HDMI Adapter + HDMI Cable.
- AirControl – Charging Cable.
- Mini HDMI to HDMI Cable.
- VESA Mount bracket.
Installing RVC 3000 CC
Configuring the Account and Network Settings
1. Configure your network settings.
- Your RVC3000cc is set to Use DHCP by default. This enables it to automatically obtain its IP address. If you want to change your network settings, use the arrow to navigate to system settings.
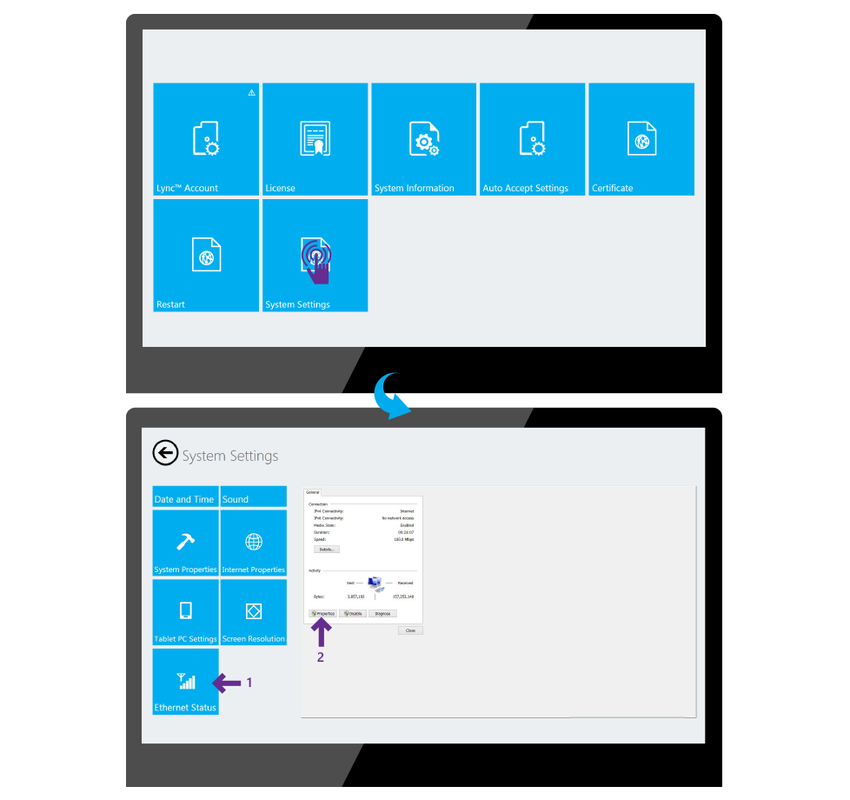
- Use the arrow to navigate to Ethernet Status then navigate to Properties (and configure your IP address manually). You can navigate to each text box, enter the appropriate setting.
2. Configure your certificate settings.
- Use the arrow to navigate to Certificate.
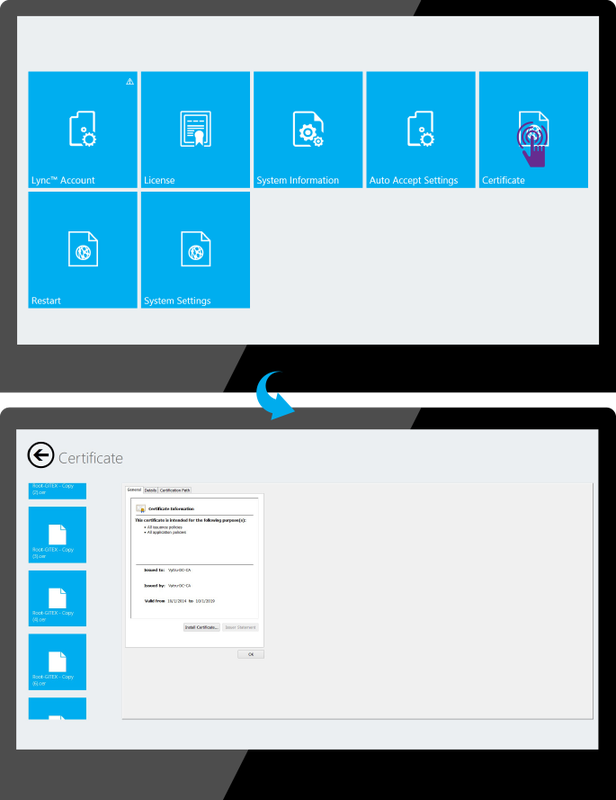
- Install the Lync certificate ONLY if you have a private certificate on your server. To install the certificate on the device put the required certificate on a flash memory and plug it on the device, install the required certificate from the flash memory after it’s detected.
3. Configure your Lync account settings.
- Use the arrow to navigate to Lync account.
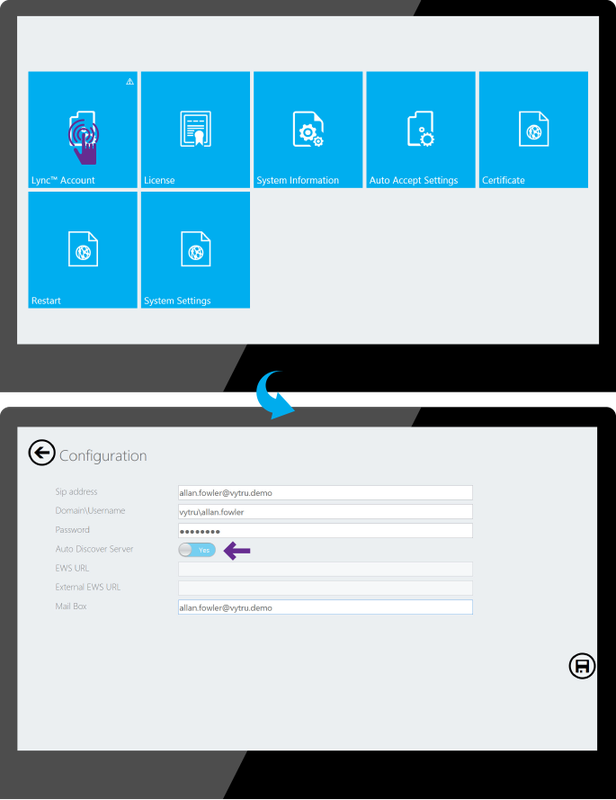
- Navigate to each text box and enter the required data (SIP address – Domain\username - Password), then you can check the Auto Discover Server button as yes and enter the Mail Box (the application will detect the EWS URC & External EWS URL automatically), if you want to enter the EWS URC & External EWS URL manually check the Auto Discover Server button as no and enter them manually and you won’t have to enter the mail box.
- Hit save button to save the changes.
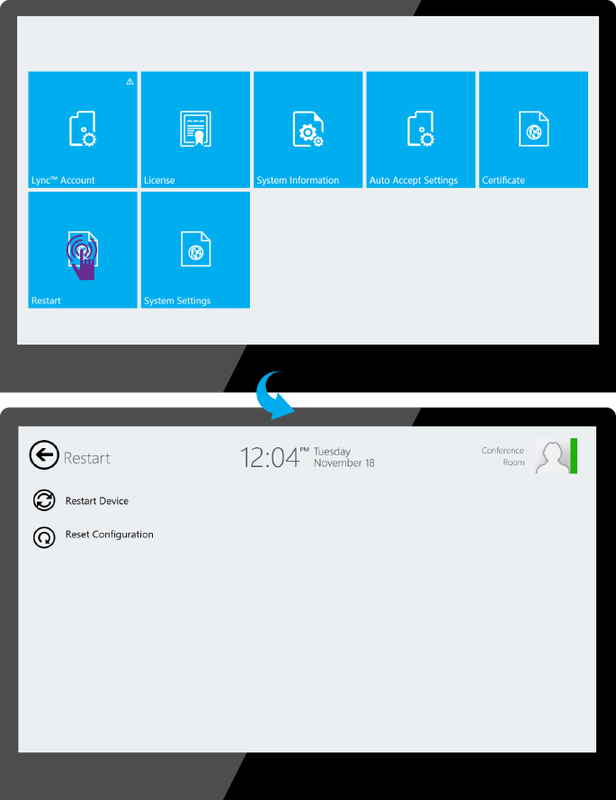
4. Restart Device.
- Use the arrow to navigate to Restart and choose restart device to submit the changes and to start to use the application.